Telepat Cloud Dashboard
Our full fledged web client for the Telepat backend, will help you browse through objects, see app activity in real time, manage your app users and configure your application for development and production.
The dashboard is available for Telepat Cloud accounts - head over to the Telepat homepage to learn more and sign up for a cloud account. For open-source installations, you can use the API to perform any operation that the dashboard allows you to peform.
Registration and login
- To login, head over to the main dashboard url, and fill in your credentials.

- To create a new account, click the
Sign upbutton from the login page, and fill in your data.

- Forgot your password? We're working on adding a web interface to allow you to reset it. For now, send us an email and we'll help you regain access to your account.
App management
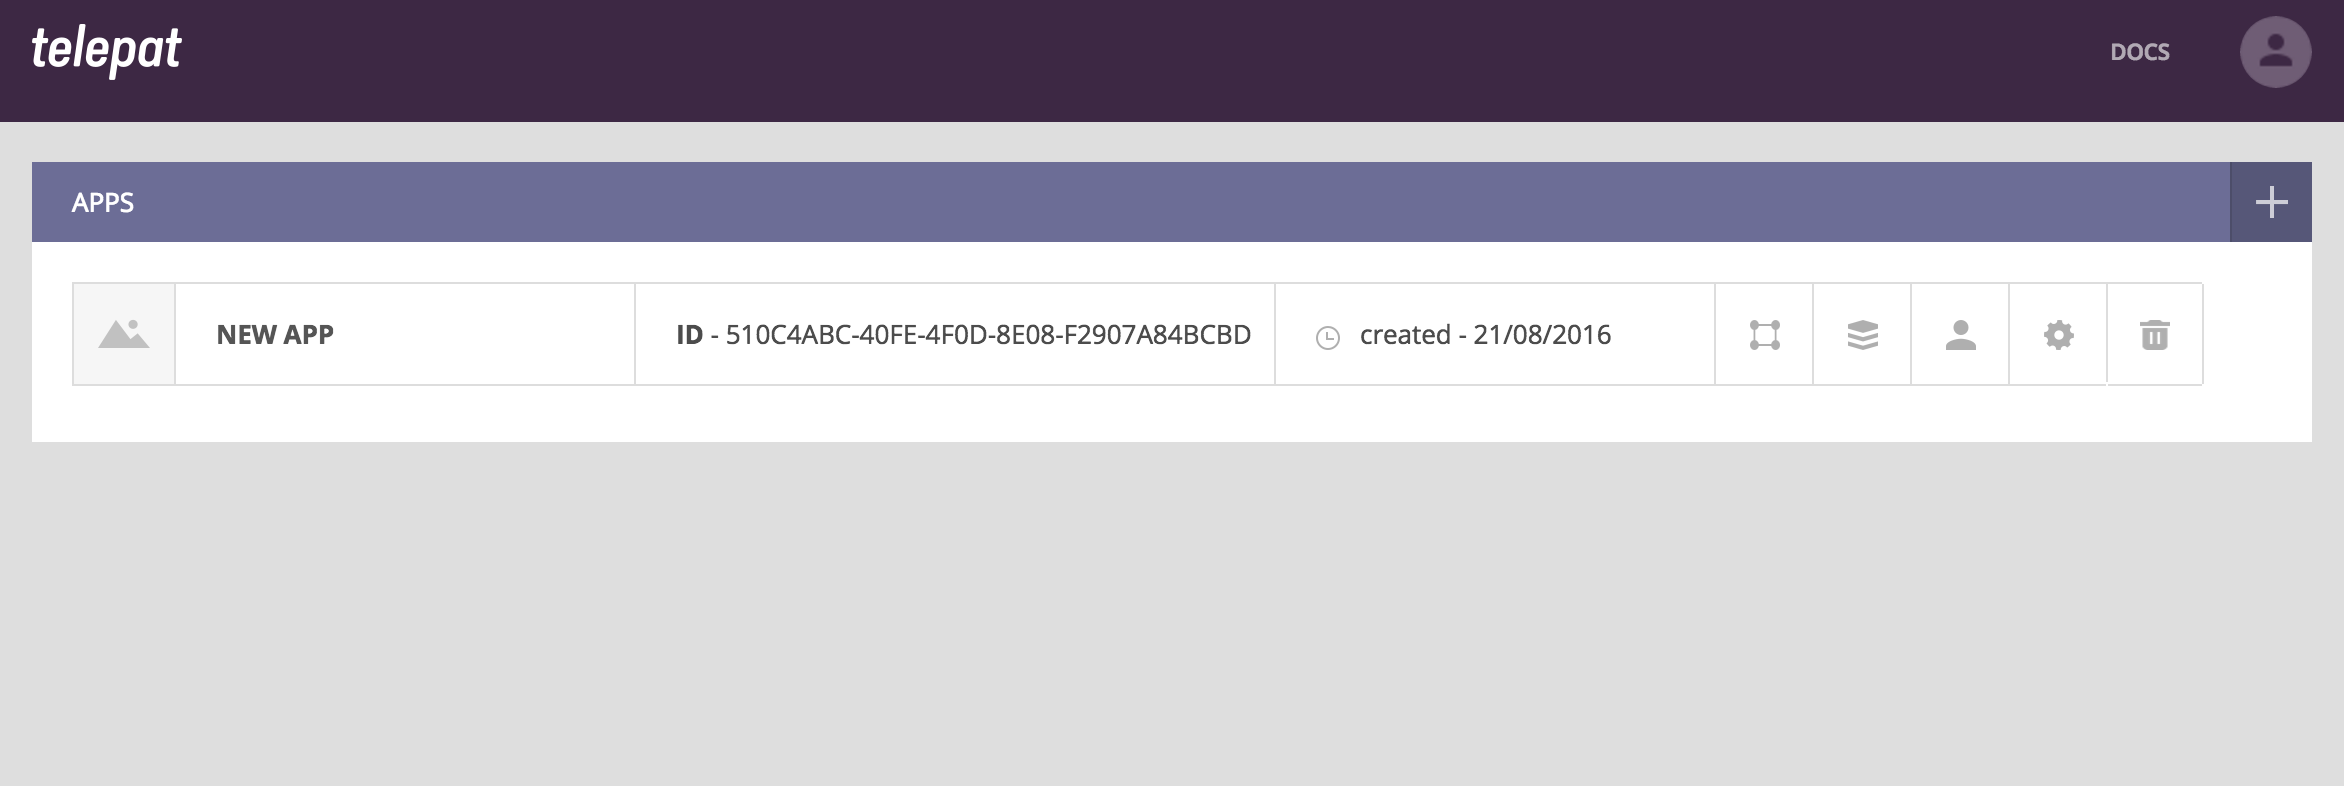
- After login, you'll be redirected to the application list. Initially, you'll have no apps set up:
![]()
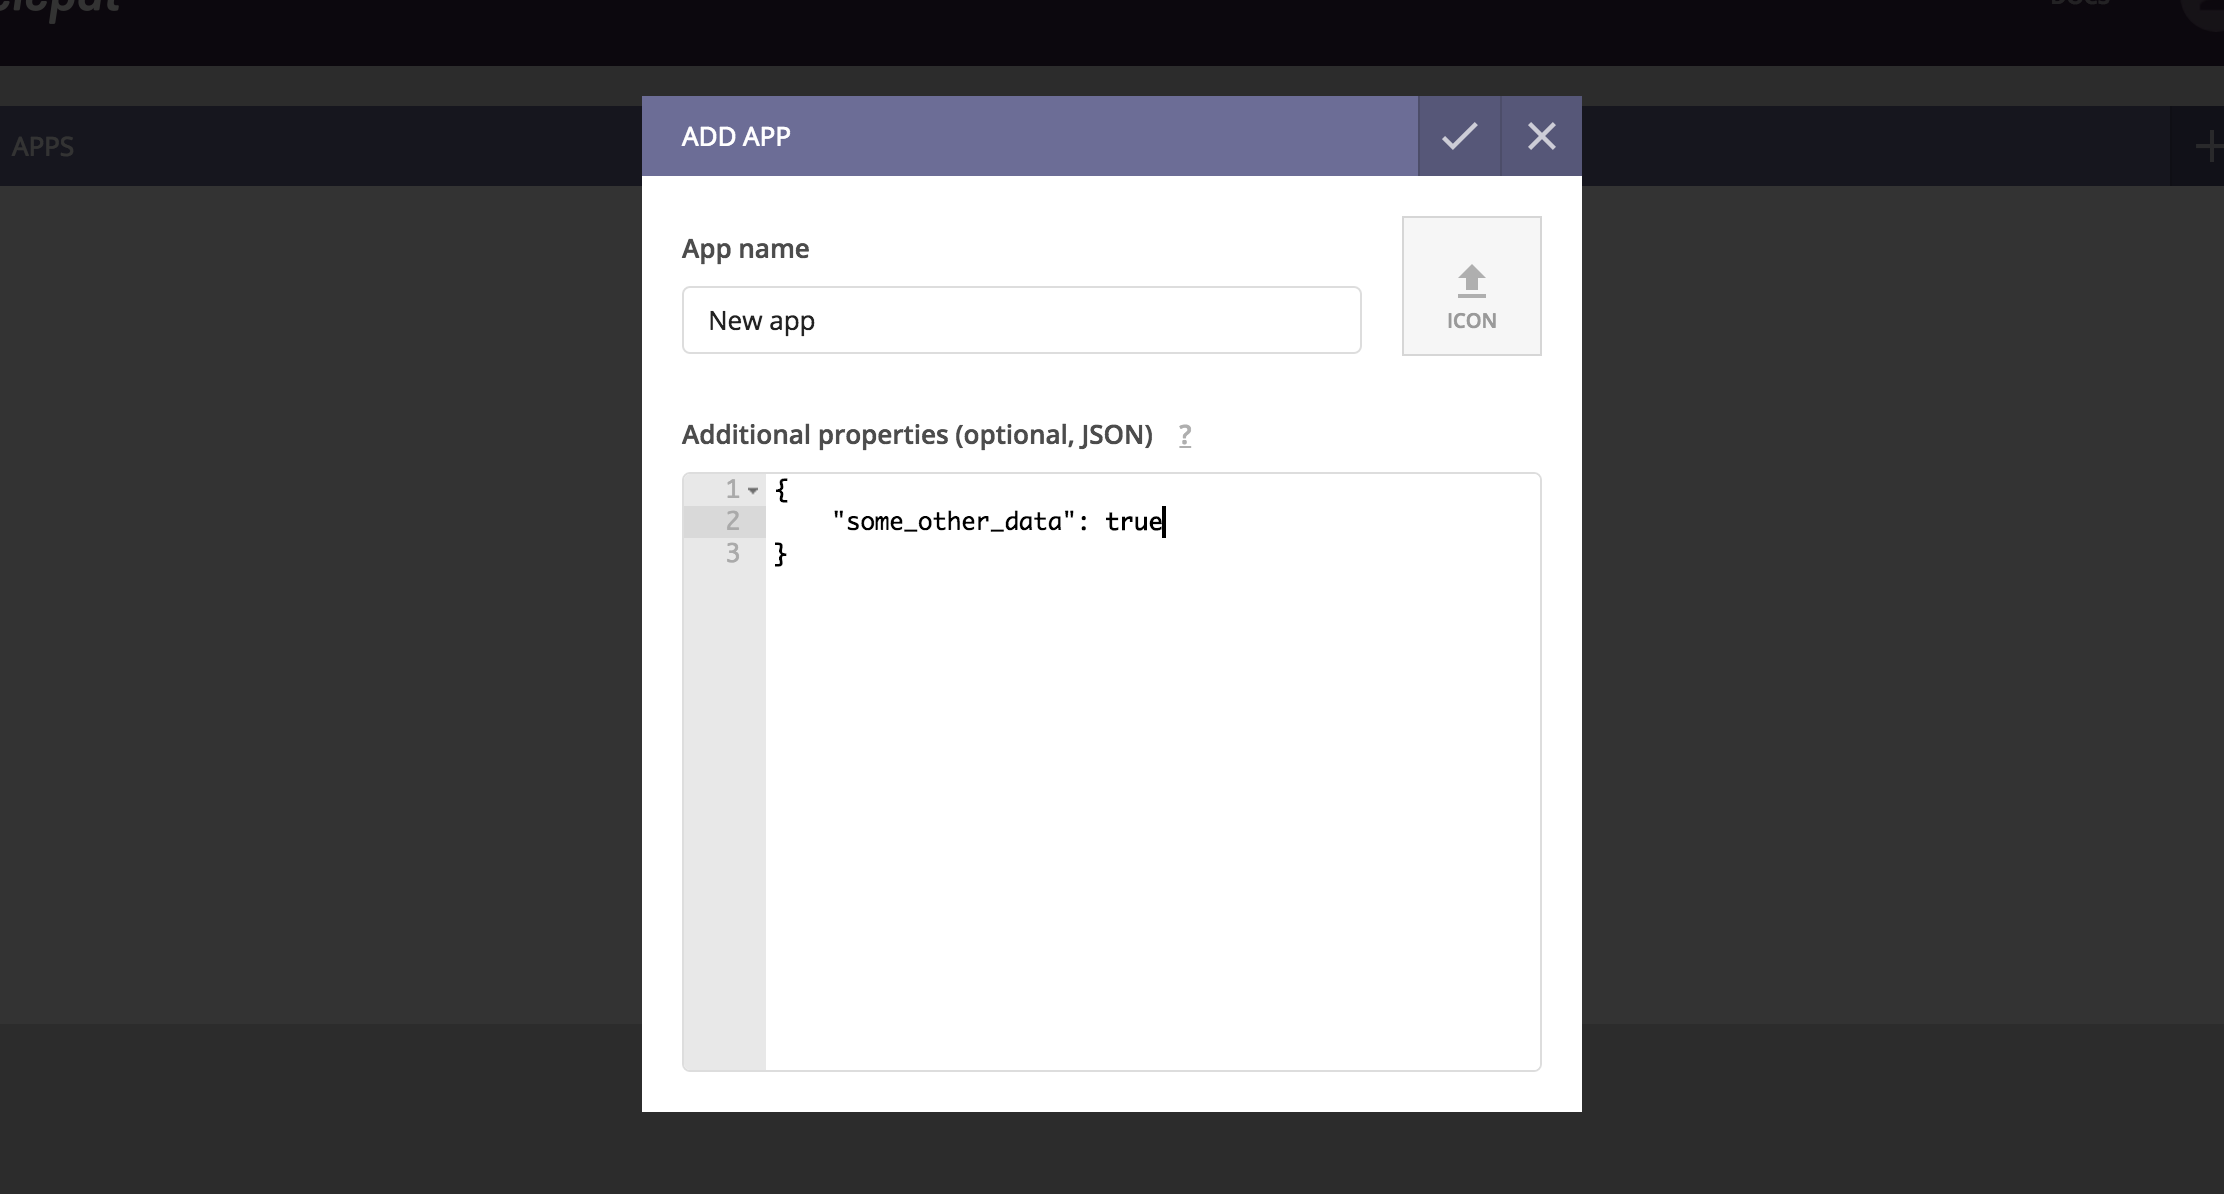
- Click on the plus button in the top right area to create a new app. You just need to fill in the app name - you can also, optionally, attach any additional JSON data.
- You can always access the complete list of apps running on your instance by clicking on the Telepat logo (in the top left area of the screen). This is where you'll also be able to delete your apps.
Editing schema
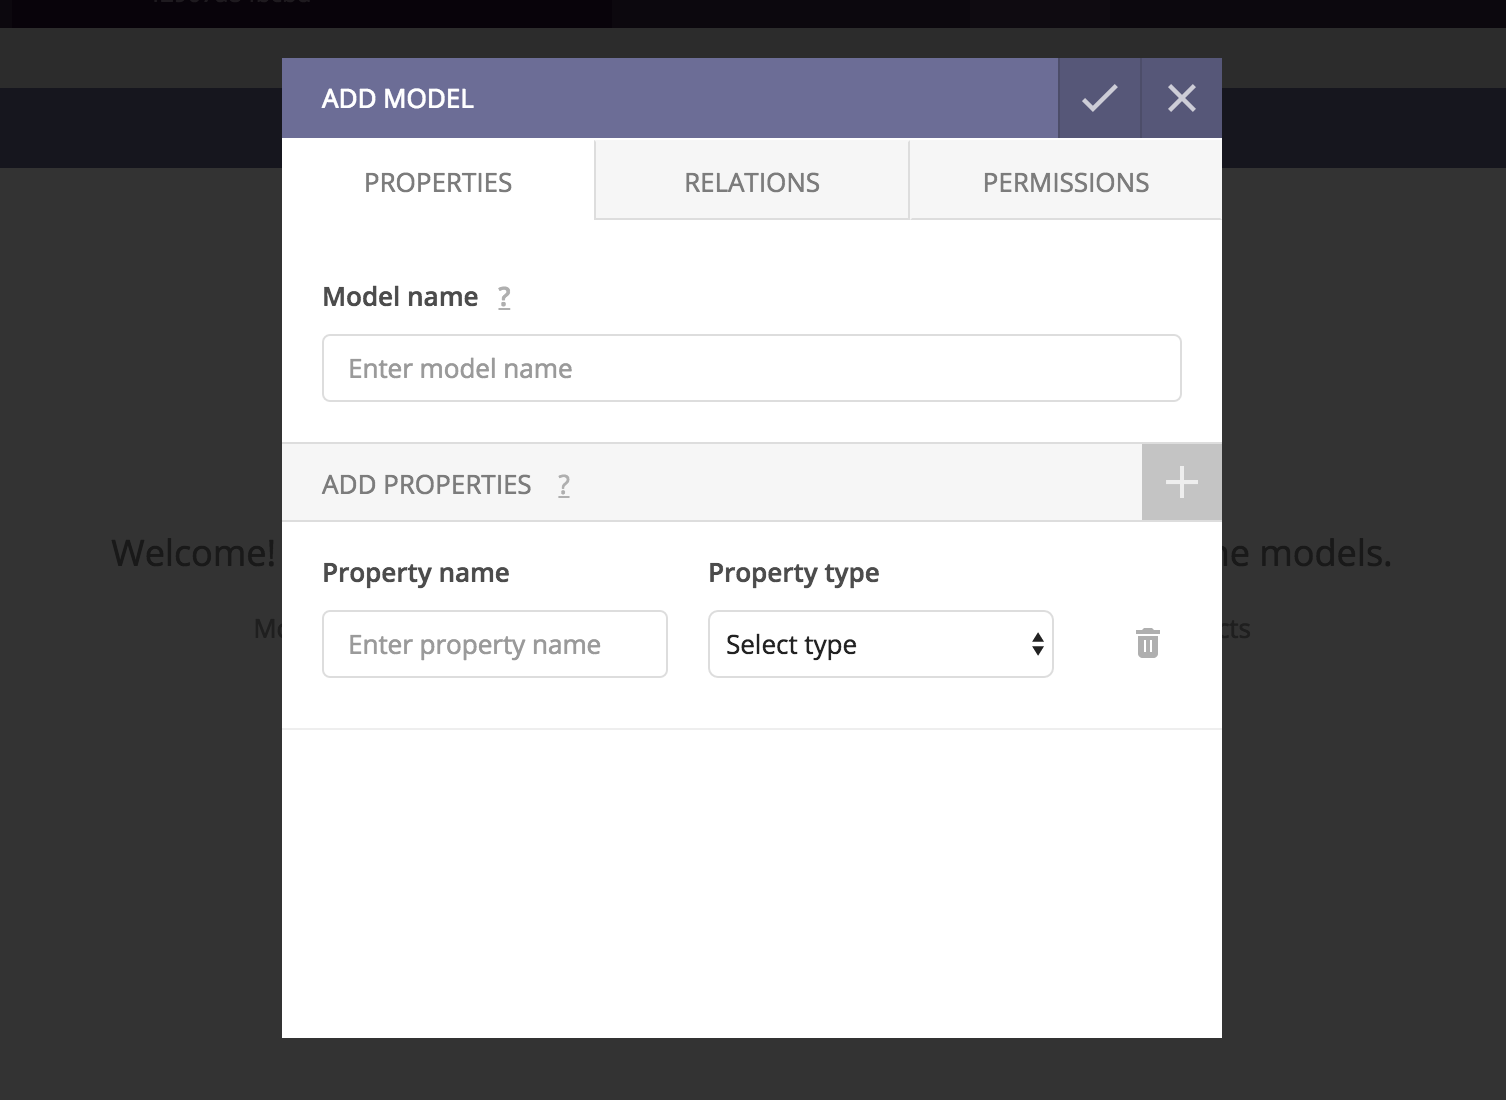
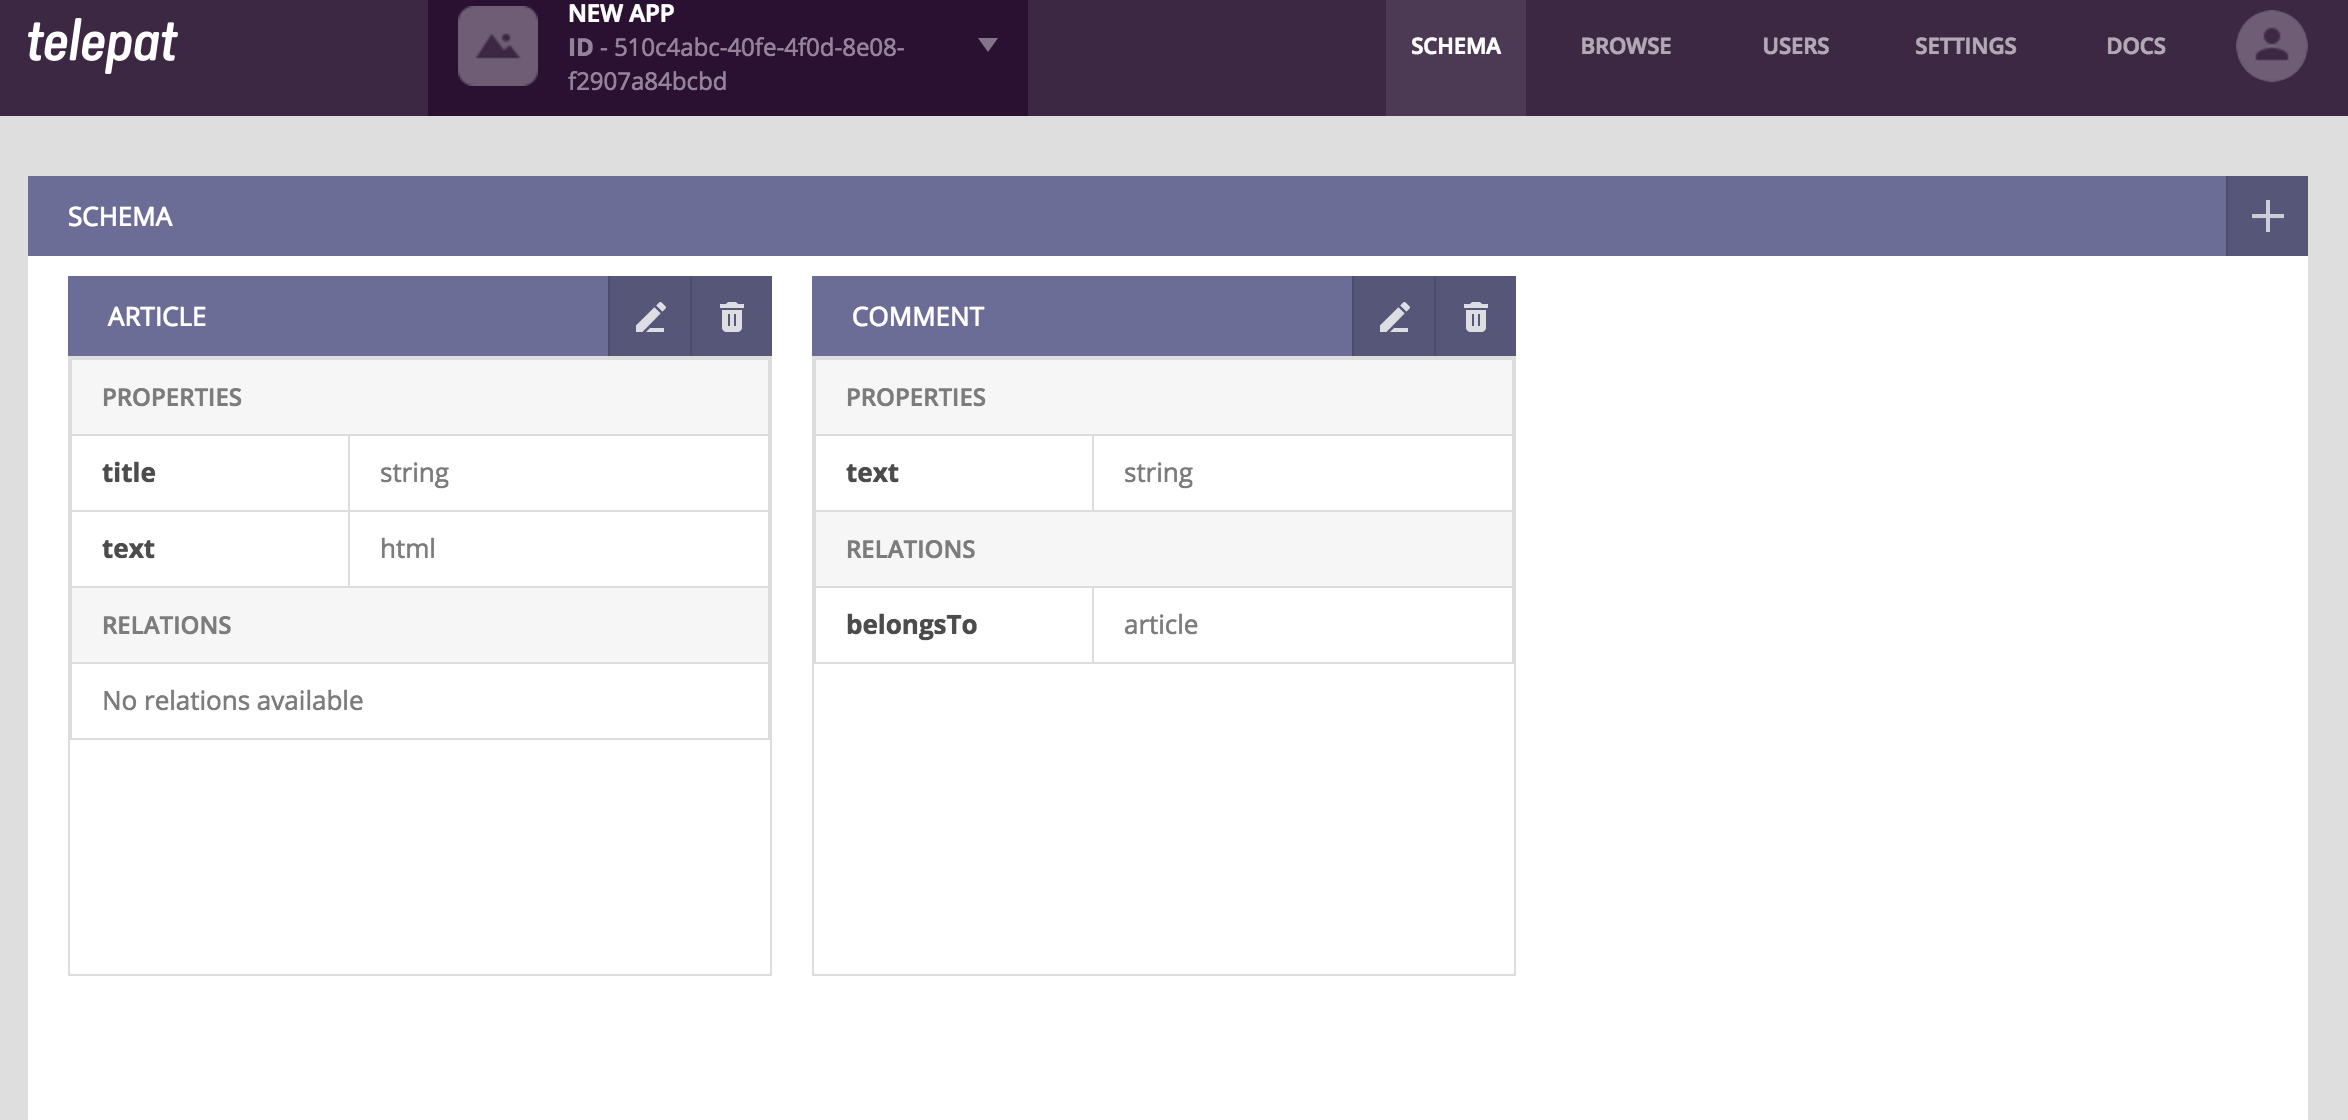
- After creating a new app, the dashboard will redirect you to the schema page of the newly created app. The first thing you need to do is define a schema, that describes how data is structured within your app. Read more about the Telepat schema here.
![]()
- The first tab of the schema page allows you to define your model name, and describe the properties that will be available for objects of this specific type. Simply define the name of the property, and the type of information it will store. You can add as many properties as you like - just click the add button next to "Add properties".
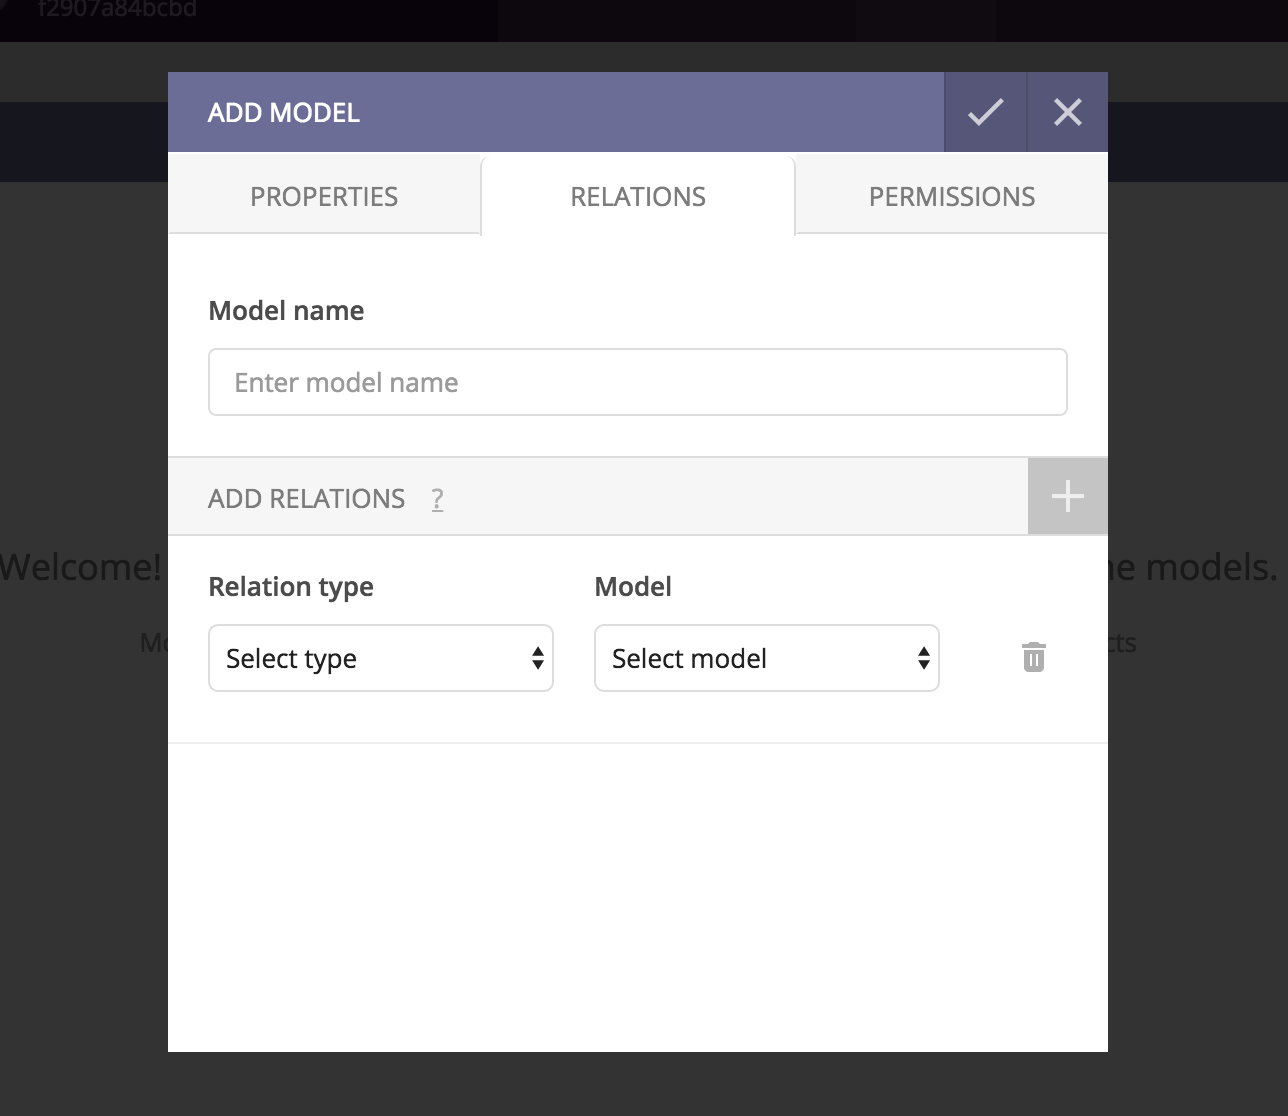
- The relations tab allows you to define relations between objects belonging to different models. Click here to read more about Telepat object relationships.
- The permissions tab allows you to define access security settings for objects of this specific type. Click here to read more about Telepat object permissions.
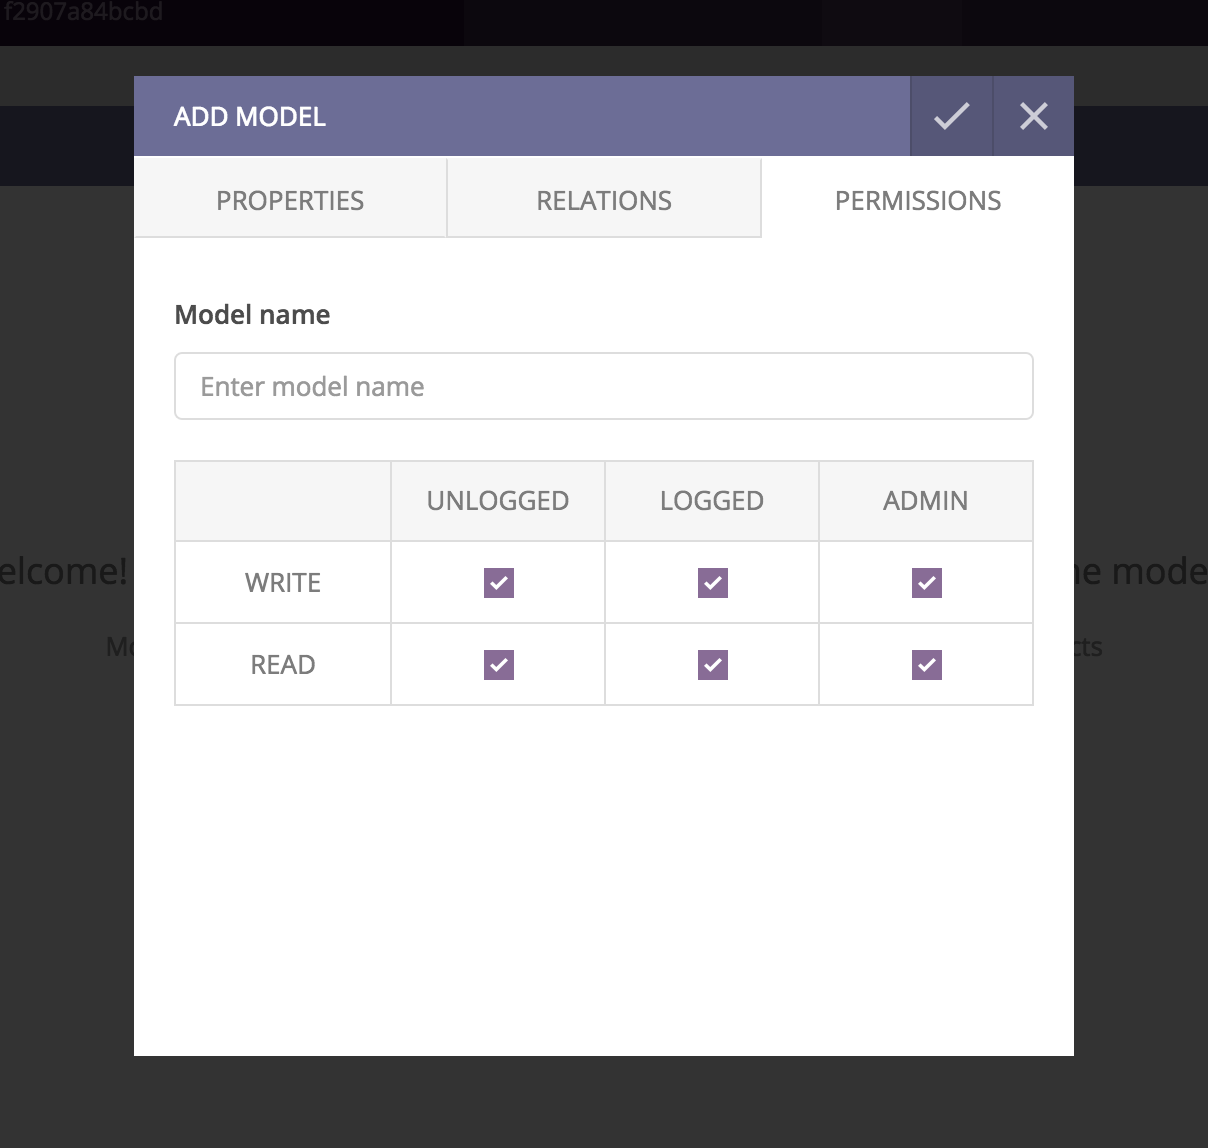
- You can add, update and delete models at any time, as you develop your app.
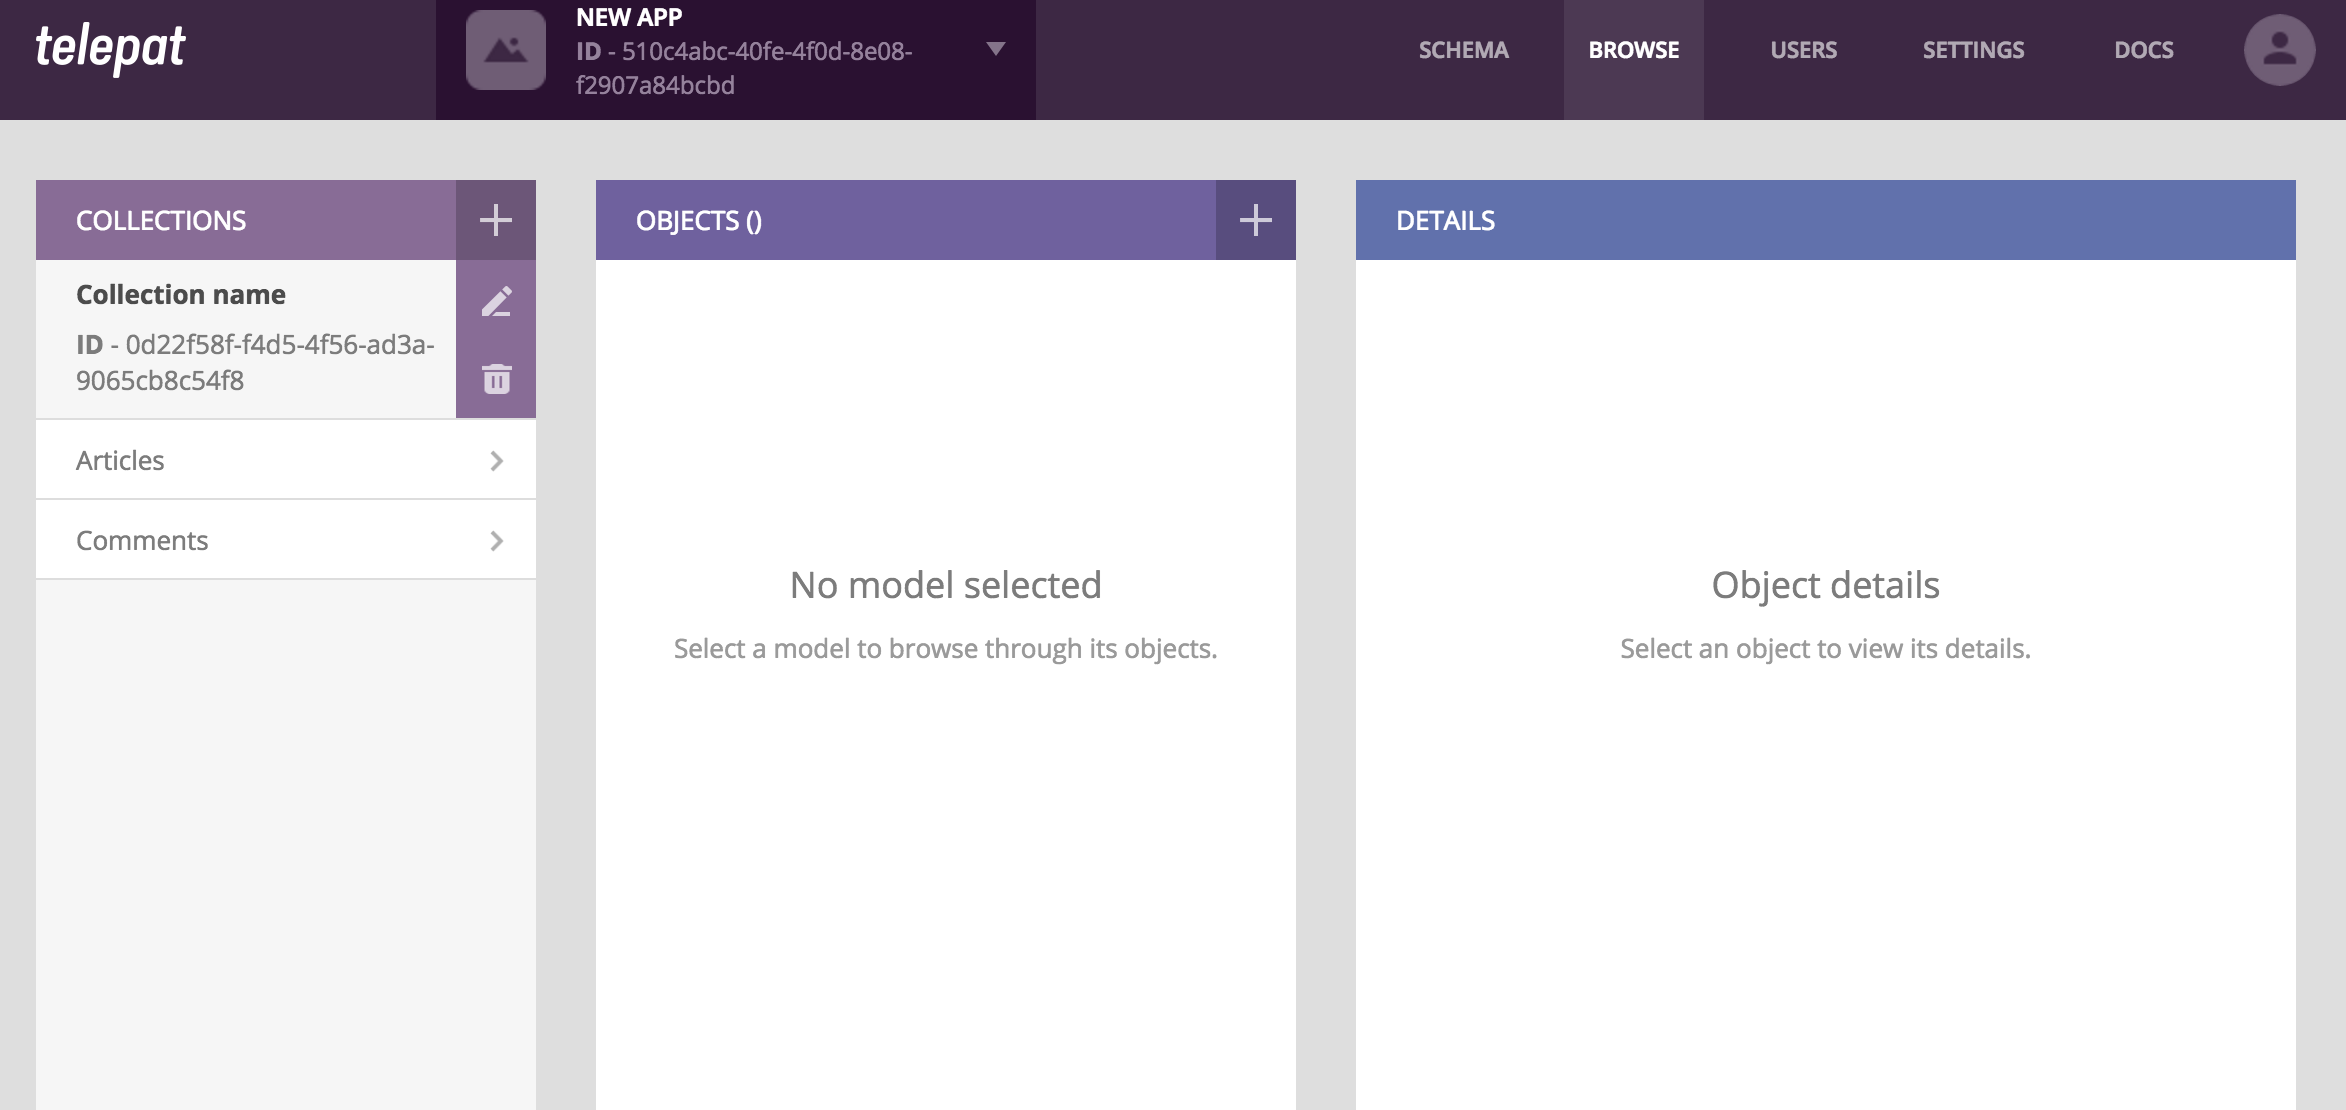
Working with objects
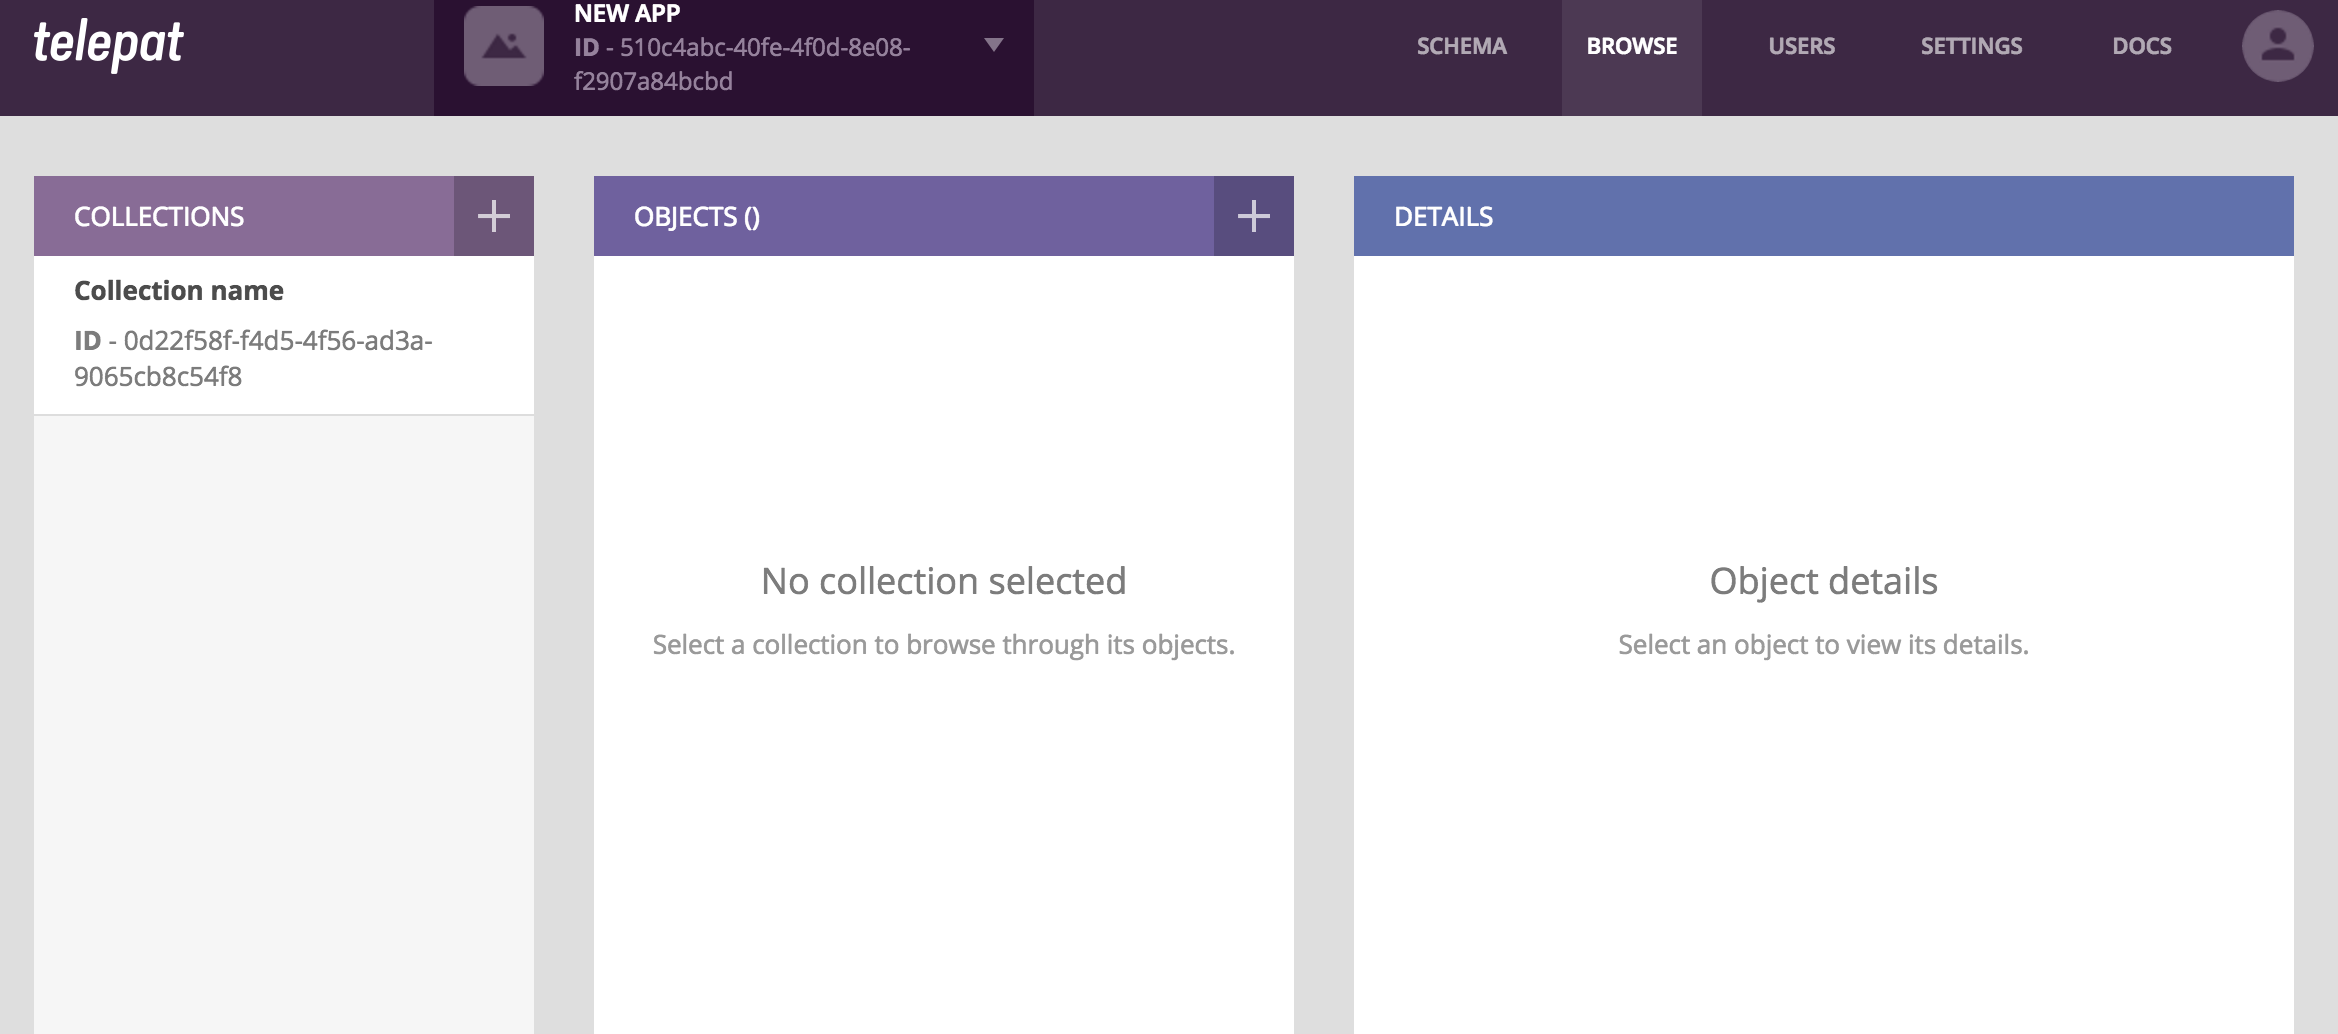
- Use the browse page of you app to work with all your application data. After creating your app, this page will be empty, as there is no data available yet:
![]()
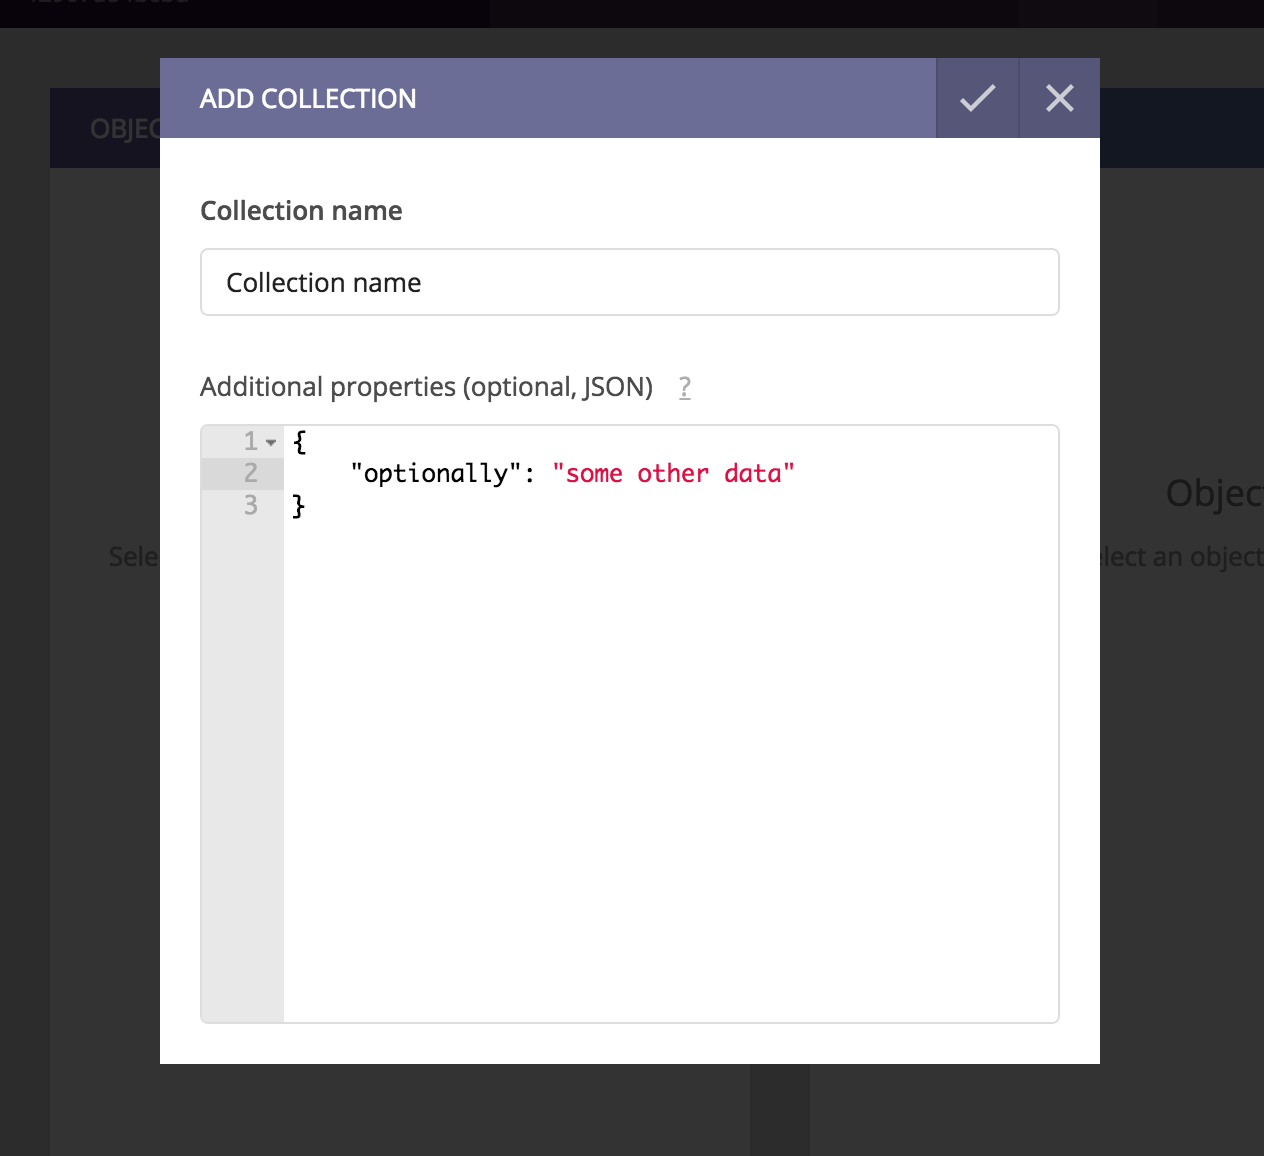
- The first thing you need to do is create at least one collection for your data. Click here to read more about Telepat object collections. Click on the plus button in the heading of the collections column, and enter a name for your collection - you can also, optionally, attach any additional JSON data.
- After adding the collection, it will become visible in the left column of the browse page. You can hover it to get access to the edit and delete buttons, or click it to access the model dropdown:
- After clicking on a specific collection, all the models you've specified in the app schema will be listed. Choose a specific model to browse objects of that type within the selected collection.
- Once you choose a collection and a model type, you'll be able to see a list of all the available objects in the central column. Initially, there will be no objects available.

- You can add a new object by clicking on the plus button in the heading of the objects column. You'll be able to fill in all the properties that you've previously defined using the schema. Press on the save button, when done.

- The new object you've created will become visible in the object list. Click on it to see more details in the right column.

- Press the edit button in the heading of the right column to update objects at any time:

- You can also use the object inspector, to see a raw JSON representation of the object and all its properties. Tap the "{}" button to launch the inspector:

- You can also use the edit button within the inspector, to perform object updates using JSON.

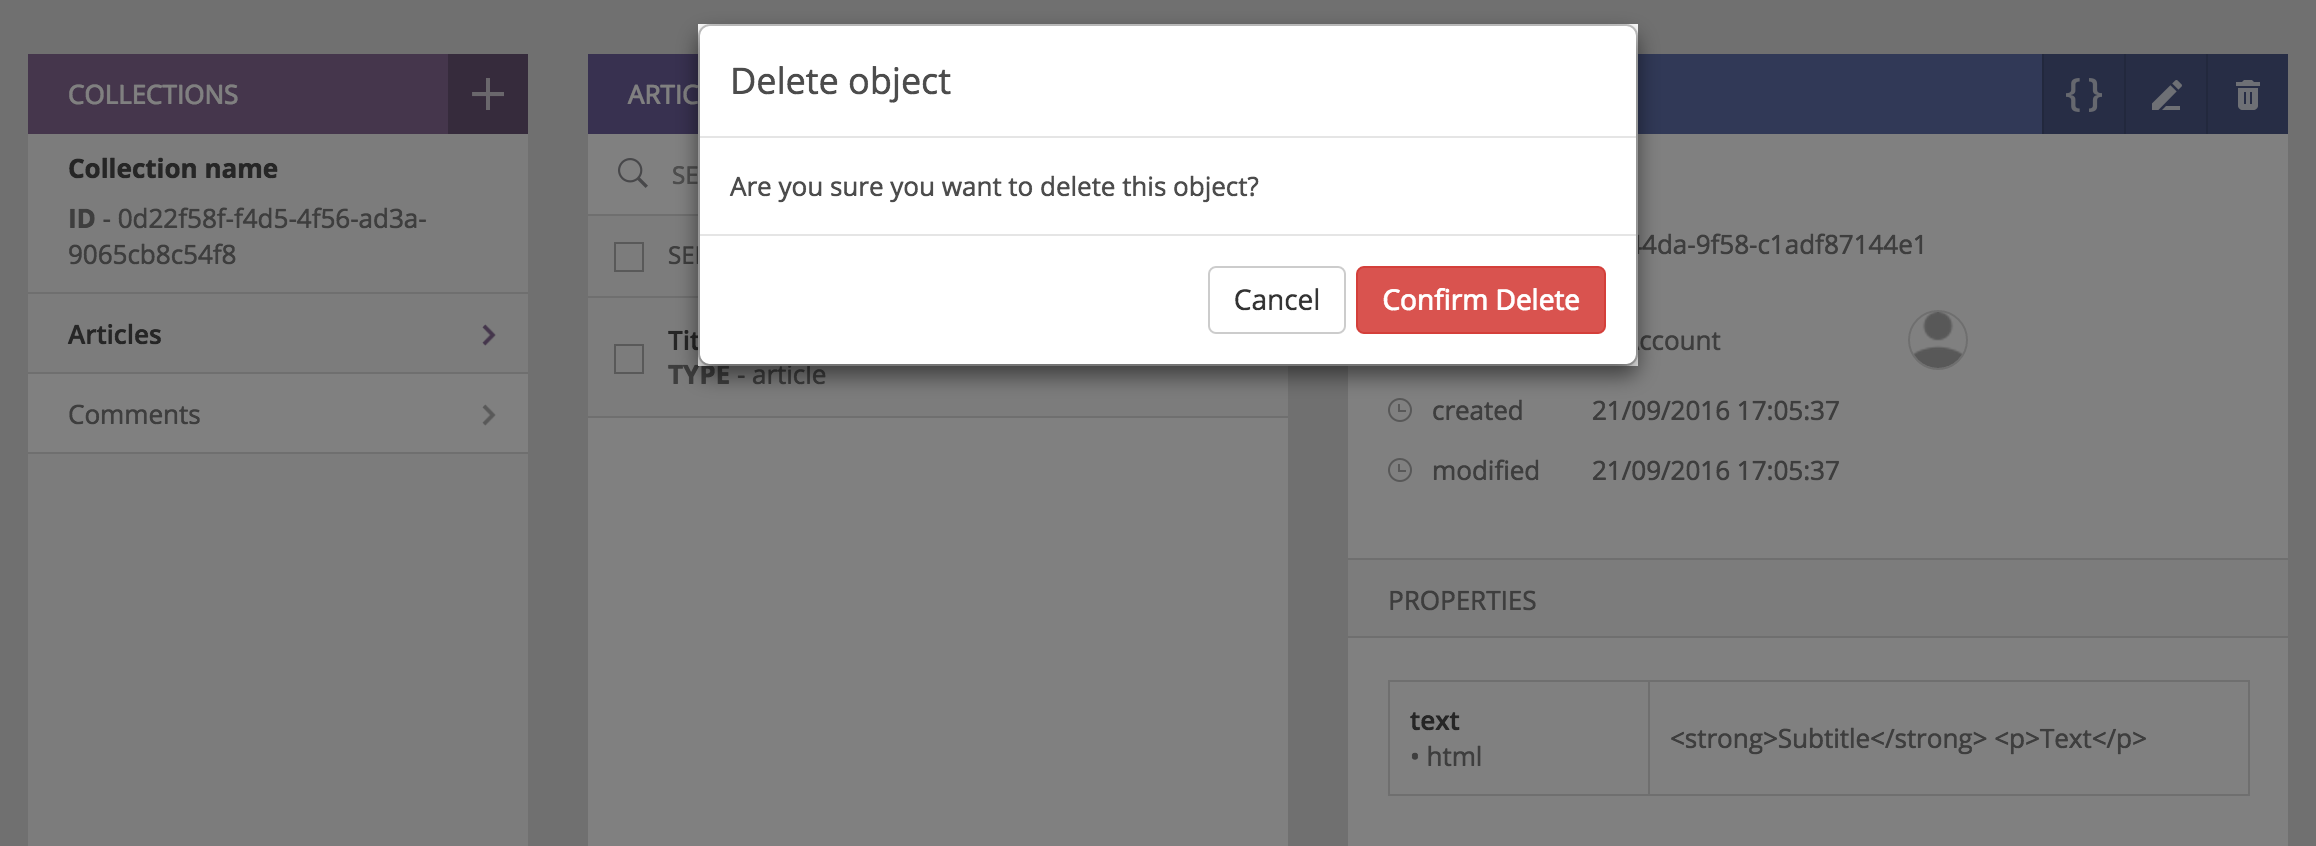
- You can also delete objects, using the trash button in the header of the right column:
- By clicking on the edit button in the "Filters" area of the central column, you can add filters to your object query (beyond the collection and the object model). Check the filter by property option, then enter the property name (as defined in the schema), and the value that you're searching for.

- If relationships are defined between models, you can also query for objects that belong to a specific parent within another model - simply check the filter by parent option, select the parent model type and enter the id of the parent object.

- Finally, you can add sorting options to the list of objects. Check the sort by property option, enter the property name (as defined in the schema), and choose the sorting direction (ascending or descending).

Managing users
- You can see a list of all the application users in the users page. Initially, your app will have no users:
![]()
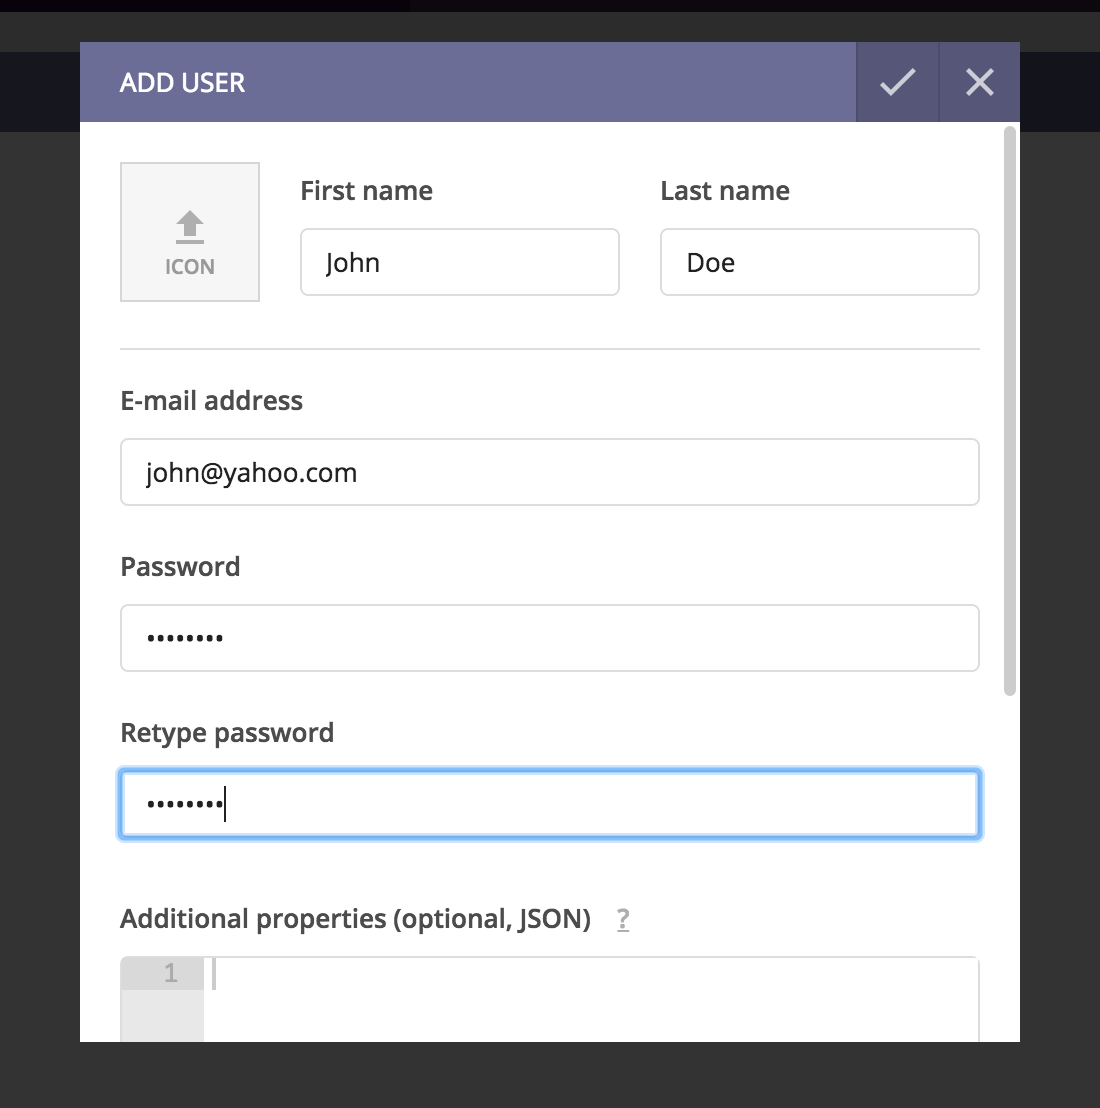
- You can add new users directly from the dashboard, using the plus button in the upper right area of the page. Enter all the user information - you can also, optionally, attach any additional JSON data to the user profile.
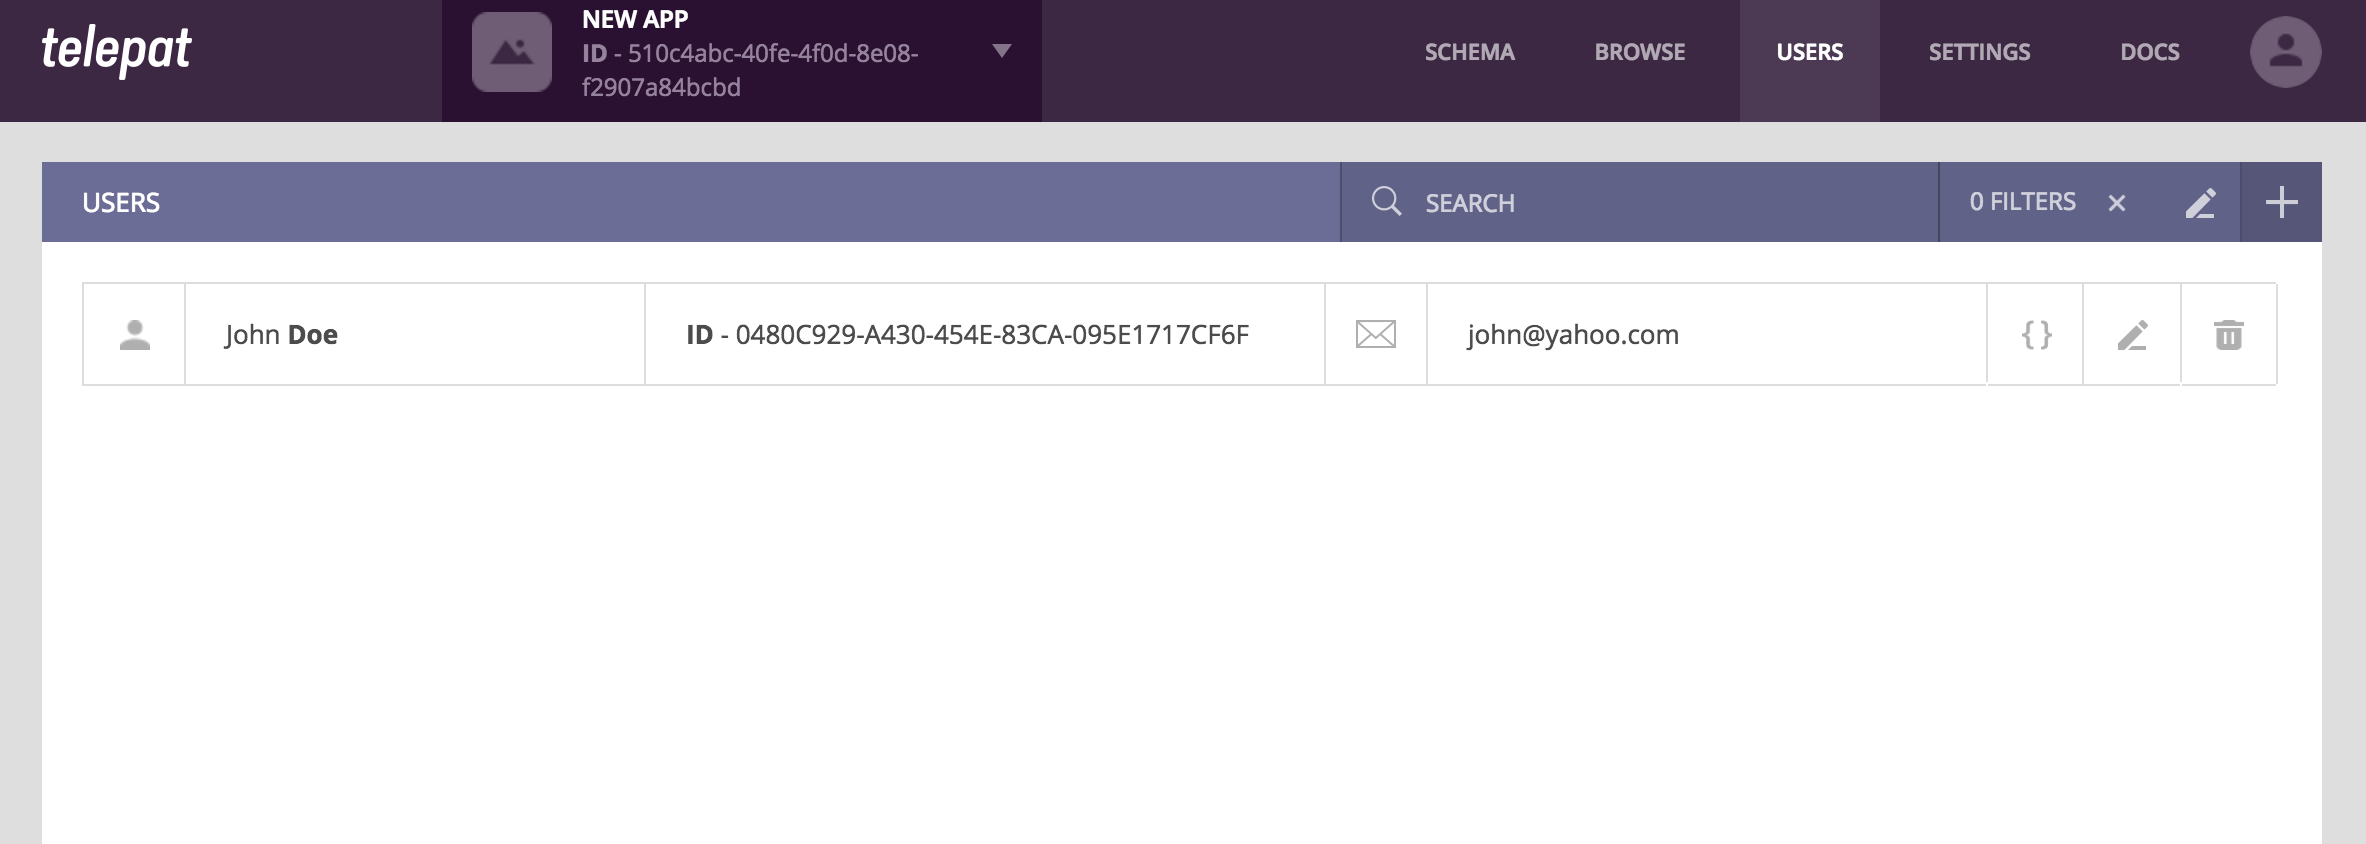
- After creating a user, you'll see the account listed in the page:
- Like with app objects, you can use the inspector to see a JSON representation of the user object, with all available properties. Tap the "{}" button to launch the inspector:

Application settings
- Finally, you can use the dashboard to setup your apps and configure things like emails and push notifications. The settings page displays basic connection information about the app, in the default tab:

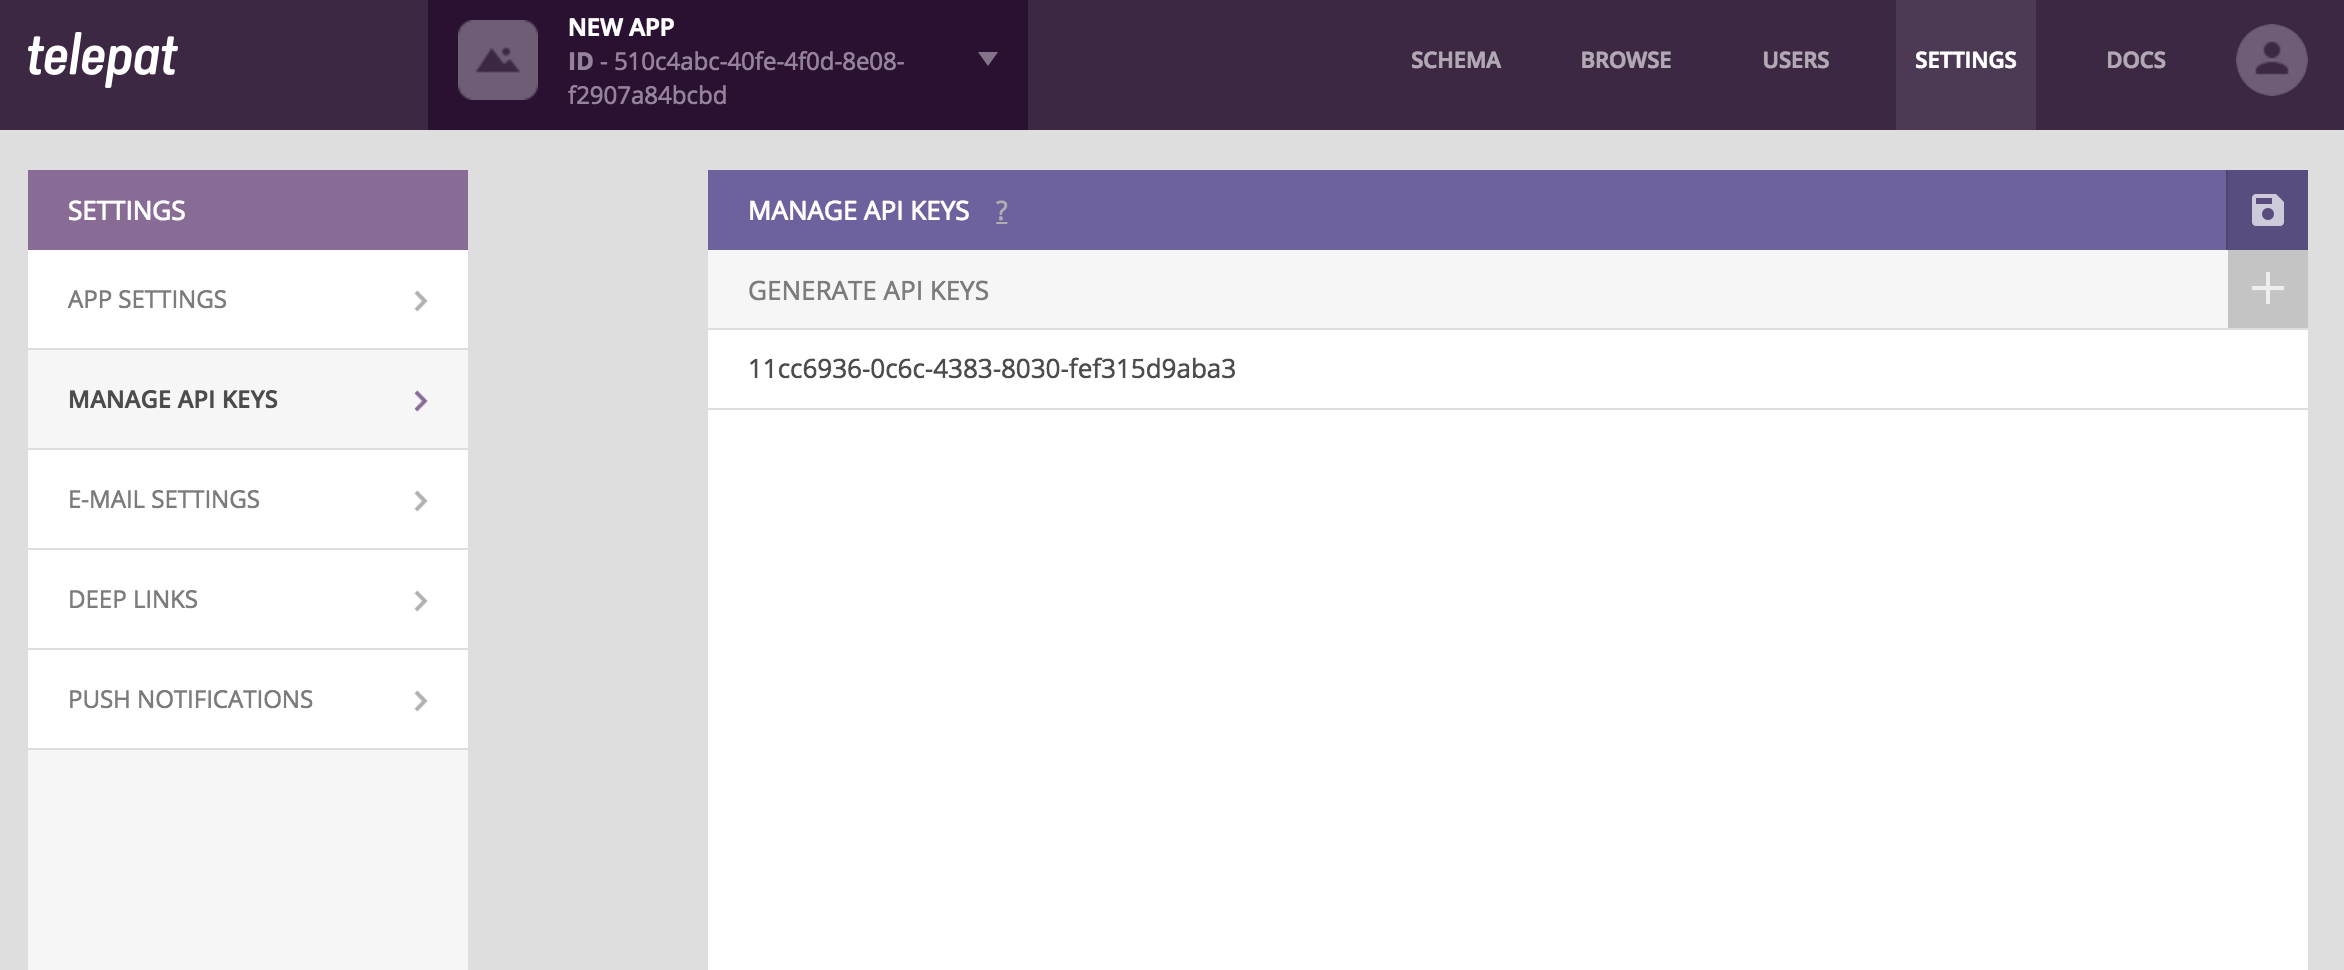
- The API keys tab allows you to manage your app's valid API keys. Clients (like the Telepat SDKs) need API keys to connect to API functionality. When creating an app, one API key is automatically generated, but you're free to add and remove as many as you need.
- The email settings tab allows you to configure the sender email address as well as the content of all emails sent by Telepat (on user registration and on password retrieval).

- The deeplinks tab allows you to define the links that the user will be redirected to (after user registration and password retrieval confirmation).

- The push notifications tab allows you to upload your GCM API key as well as the certificate and password for accessing APN.
